No products in the cart.
Tools & Hardware
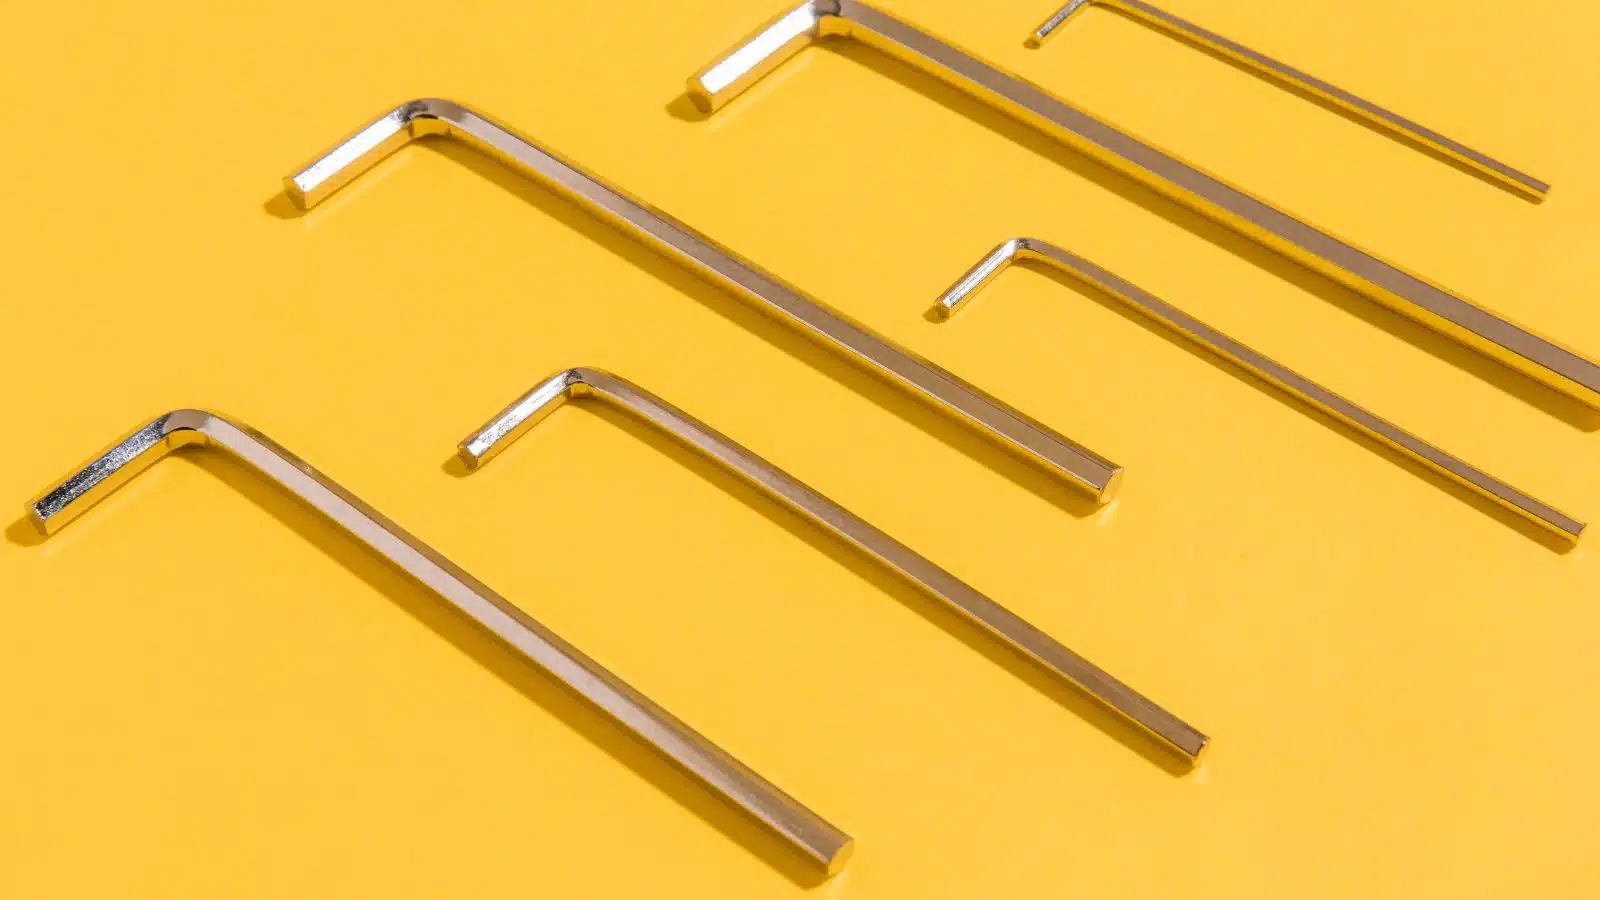
Why Choose Long Chrome Vanadium Allen Wrenches for Your Toolbox
Why Choose Long Chrome Vanadium Allen Wrenches for Your Toolbox: When it comes to equipping...

+966 59 204 1946
No products in the cart.
The satisfaction of a perfectly executed DIY project is unparalleled, but often, the journey to that flawless finish is fraught with minor frustrations. We’ve all been there: the screw that rolls away into oblivion, the tangled mess of cords, or the relentless dust cloud that follows a simple drilling task. These aren’t just minor inconveniences; they chip away at our patience, extend project timelines, and can even compromise the quality of our work.
Think back to that moment when you’re perched precariously, holding a component in one hand and fumbling for a tiny screw with the other, only for it to slip through your fingers and vanish into the abyss of the workshop floor. Or perhaps you’ve spent more time untangling power cords and searching for the right drill bit than actually working on your project. These scenarios are all too common in both the busiest commercial workshops and the humblest home garages. We understand this frustration intimately, as we’ve seen similar issues, albeit on a grander scale, plague efficiency in even the most sophisticated industrial settings. The core problem, whether at home or in industry, often boils down to a lack of refined tool hacks and optimized workflows.
But what if these everyday frustrations could be transformed into opportunities for ingenuity? What if a few simple, often overlooked tool hacks could not only prevent these mishaps but actively enhance your DIY productivity? At AskA Solution, we constantly explore innovative approaches to efficiency, not just for our large-scale clients, but for every individual striving to improve their craft. We believe that smarter working isn’t about expensive new gear; it’s about clever tool uses and resourceful thinking. It’s about finding those ingenious solutions that make your workshop a more enjoyable, productive, and less frustrating place to create.
In this comprehensive guide, we’re not just offering quick DIY tips; we’re sharing seven transformative tool hacks that are designed to elevate your craft. These aren’t just theoretical suggestions; these are practical, battle-tested DIY solutions that embody the principles of efficiency and resourcefulness we champion in our own multi-disciplinary operations. By the end, you’ll discover how these tool hacks can lead to a more organized, less stressful, and ultimately, more fulfilling DIY experience, empowering you to tackle any project with renewed confidence.
The true value of mastering tool hacks and clever tool uses extends far beyond simply completing a project. It’s about cultivating a mindset of efficiency, ingenuity, and sustainability that impacts every aspect of your creative endeavors. We often observe that the most successful projects, whether a complex industrial installation or a weekend home improvement task, are those where every resource, including time and mental energy, is optimized.
In the realm of DIY, time is a precious commodity, and your sanity, even more so. Frustration can quickly turn a passionate hobby into a dreaded chore. By implementing smart tool hacks, you’re not just saving a few minutes here and there; you’re preserving your enthusiasm and focus. Imagine spending less time searching for misplaced items, cleaning up preventable messes, or wrestling with stubborn materials. This improved DIY productivity allows you to allocate more effort to the creative and skilled aspects of your project, rather than the mundane and irritating ones. We’ve learned from countless client engagements that streamlining processes isn,t just about speed; it’s about reducing friction and maintaining morale, which is vital whether you’re managing a factory floor or building a bookshelf.
There’s immense satisfaction in seeing a project through to completion, especially when it’s done efficiently and to a high standard. Project efficiency doesn’t mean rushing; it means working smarter, not harder. Clever tool uses are the secret sauce that allows you to achieve more with less effort, transforming complex tasks into manageable steps. When you adopt these tool hacks, you begin to anticipate problems and preemptively implement solutions, leading to smoother workflows and fewer reworks. For our contracting clients, we often emphasize that efficiency gains in small, repeatable tasks accumulate into significant time and cost savings over the lifespan of a large project. The same principle applies directly to your personal workshop, allowing you to tackle more ambitious home improvement tricks with confidence.
Ultimately, embracing ingenious tool hacks is a step towards mastering your craft. It’s about understanding your tools, your materials, and your processes so intimately that you can bend them to your will, creating elegant DIY solutions to common problems. This elevated level of understanding and control fosters confidence, enabling you to take on more challenging projects and develop your skills further. It’s the difference between merely assembling something and truly crafting it. These aren’t just handyman tips; they are foundational principles of skilled work that empower you to transition from a weekend hobbyist to a true artisan, continuously refining your workshop organization and enhancing your capabilities.
✅ The magnetic wristband is one of those tool hacks that, once adopted, you’ll wonder how you ever lived without. It’s a simple yet profoundly effective solution to one of the most common and frustrating problems in any DIY endeavor: the disappearing fastener. We consider it an essential workshop tool for anyone who deals with small components regularly.
Picture this: you’re installing new hardware, assembling furniture, or performing delicate electronic repairs. Your hands are full, and you need a steady supply of screws, nails, or drill bits. You place them precariously on a workbench, in a small dish, or even in your mouth (a common, albeit unsafe, handyman tip we strongly discourage!). Inevitably, one slips, bounces, and disappears into the murky depths beneath your workbench. The search begins, costing valuable time, breaking your concentration, and sometimes even leading to the complete loss of a critical component, which can derail project efficiency entirely. This fumbling is not just an annoyance; it’s a significant drain on DIY productivity.
The magnetic wristband is an elegant DIY solution to this age-old problem. This accessory, typically a fabric strap embedded with powerful magnets, wraps comfortably around your wrist or even attaches to a belt. It acts as a portable, always-available holding station for all your metallic fasteners, bits, and small metal essential workshop tools. Instead of scattering screws across a tray, you simply press them onto the wristband. They stay put, ready for immediate access whenever you need them. This simple tool hack dramatically reduces the chance of losing components, keeping your workspace tidier and your workflow uninterrupted. It’s a prime example of how clever tool uses can make a world of difference.
At AskA Solution, we’ve implemented similar principles of immediate access and containment in our larger industrial and contracting projects. While our technicians might use magnetic parts trays or specialized pouches, the core idea is the same: minimize travel time for components and eliminate opportunities for loss. For many of our contracting clients, we’ve observed that a lost bolt or a misplaced washer can hold up an entire assembly line or delay a critical repair. We always recommend integrating such tool hacks into workflow design, resulting in tangible gains in project efficiency. Applying this insight to your home projects means you’ll spend more time building and less time searching, significantly boosting your overall DIY productivity and making the entire experience far more enjoyable.
💡 Few things disrupt workshop organization and DIY productivity quite like a tangled mass of power cords, extension leads, and an assortment of drill bits scattered haphazardly. This hack leverages the versatility and low cost of PVC piping to create custom tool storage ideas that restore order and efficiency.
Every DIY enthusiast knows the struggle: you reach for a specific drill bit, only to find it at the bottom of a dusty box, indistinguishable from a dozen others. Or you need an extension cord, but it’s knotted into an impenetrable Gordian knot with three other cables, demanding precious minutes to unravel. This lack of proper workshop organization not only wastes time but can also damage tools and create safety hazards. Loose cords are tripping hazards, and unprotected bits can dull or even cause injury. These frustrations are common in any workshop, from the largest commercial spaces where essential workshop tools are constantly in demand, to the smallest home improvement nook.
PVC pipes offer an incredibly versatile and budget DIY solution for creating customized tool storage ideas. Different diameters can accommodate a vast array of items. Larger diameter pipes (e.g., 2-4 inches) can be cut into short sections and mounted vertically or horizontally to store power tools like cordless drills, caulking guns, or even spray cans. Smaller diameter pipes (e.g., 1/2-1 inch) are perfect for drill bits, screwdrivers, files, or even individual rolls of sandpaper. By cutting the pipes to various lengths and attaching them to pegboards or workshop walls with clips or screws, you create a dedicated, visible, and easily accessible home for each item. This significantly enhances your workshop organization and makes finding what you need a breeze.
Implementing PVC pipe organizers is a straightforward home improvement trick that yields immediate benefits. For cords, simply cut small sections of larger PVC pipe, slice them lengthwise, and use them as cable tidies mounted on a wall or under a bench. For drill bits, cut short sections of pipe, cap one end, and mount them in a rack. Label each pipe for specific bit sizes or tool types. This level of workshop organization is not just about aesthetics; it’s about optimizing your workflow and enhancing DIY productivity. We understand the value of a tidy workspace, as our field teams rely on precise tool storage ideas to ensure quick access to essential workshop tools and parts, minimizing downtime on critical projects. Embracing such clever tool uses can transform a chaotic bench into a model of efficiency, providing peace of mind and more time for actual building.
“A well-organized workspace isn’t a luxury; it’s a fundamental requirement for safety, efficiency, and quality in any craft. These simple tool hacks democratize professional-level workshop organization for every DIYer.” – Eleanor Vance, Industrial Efficiency Consultant
➡️ The agony of a stripped screw head is a universal experience for anyone who has ever turned a screwdriver. It’s a common stumbling block that can halt DIY productivity, damage materials, and cause immense frustration. This ingenious tool hack uses a simple rubber band to provide the extra grip needed to rescue those seemingly hopeless fasteners.
You’re meticulously working on a project, perhaps assembling a piece of furniture or performing a repair. Suddenly, a screw refuses to budge. You apply more pressure, try a different screwdriver, but the head is already partially stripped, offering no purchase. Each attempt only grinds away more metal, deepening the rut and making the situation worse. This isn’t just an annoyance; it’s a project stopper. The inability to remove or tighten a screw can completely stall progress, leading to damaged materials, wasted time, and the unpleasant prospect of having to drill out the screw or resort to more aggressive, potentially destructive methods. Such setbacks are a significant drain on project efficiency and can quickly dampen the enthusiasm for any home improvement tricks you’re attempting.
This particular tool hack is a testament to the power of simple DIY solutions. When faced with a stripped screw head, take a wide rubber band (the thicker, the better) and place it over the screw head. Then, insert your screwdriver into the head, pressing firmly while twisting. The rubber band fills the stripped-out grooves, creating a temporary, high-friction surface that allows the screwdriver bit to engage with the screw head. This added grip often provides just enough purchase to loosen or tighten the stubborn fastener. It’s an incredibly effective handyman tip that can save you from a major headache and prevent further damage to both the screw and your project. This is one of those clever tool uses that makes you rethink everyday objects.
We’ve seen how minor issues can escalate into significant delays in large-scale operations. A single stripped bolt in a critical machine can lead to hours of downtime. The rubber band tool hack embodies the principle of finding quick, non-invasive fixes for common problems. It not only saves you the frustration of a stalled project but also prevents potential damage to your materials. Instead of reaching for a drill or a hacksaw, which might mar the surrounding surface, this DIY solution offers a gentle, controlled method of removal. It’s an invaluable addition to your arsenal of DIY tips and ensures that minor setbacks don’t derail your entire project efficiency. We consistently advocate for simple, effective problem-solving, and this classic tool hack perfectly illustrates how a humble item can deliver professional-level results.
✅ Drilling holes, especially into drywall or wood, inevitably creates a dusty mess. This seemingly minor issue can quickly accumulate, turning a clean workspace into a fine powder snowscape. This tool hack uses a readily available and free material – cardboard – to effectively contain drill dust, making cleanup dramatically simpler.
Whether you’re hanging a picture, mounting a shelf, or routing cables, drilling creates particulate matter. This dust doesn’t just settle on your workbench; it gets into every crevice, clings to tools, and potentially into your lungs. Beyond the aesthetic mess, excessive dust can be harmful, irritate allergies, and even interfere with sensitive electronics. The cleanup itself often takes as long as the drilling task, involving vacuuming, wiping, and sometimes even a full workshop overhaul. For anyone engaged in home improvement tricks or regular DIY, managing this dust is a perpetual challenge that can significantly detract from DIY productivity. It’s a messy reality that needs a smart DIY solution.
The cardboard catch-all is one of the simplest and most effective clever tool uses for managing drill dust. Take a piece of cardboard, perhaps from a discarded box, and fold it into a scoop or half-funnel shape. Tape it directly below where you intend to drill. As you drill, the cardboard acts as a funnel, directing all the falling dust directly into its impromptu basin. Alternatively, you can create a cone shape or even just use a flattened piece of cardboard with a small hole poked in the center, through which you’ll drill. This allows the cardboard to sit flush against the wall and catch the dust. Once drilling is complete, simply remove the cardboard and dispose of the contained dust, leaving your workspace virtually spotless. This budget DIY approach proves that effective DIY solutions don’t need to be expensive.
We always emphasize the importance of maintaining a clean and safe work environment, whether on a construction site or in a commercial workshop. Dust control, in particular, is critical for health, equipment longevity, and overall project efficiency. While our industrial clients might use sophisticated dust extraction systems for large-scale operations, the principle behind the cardboard catch-all is identical: contain the mess at the source. This specific tool hack is a favorite among our staff for quick home improvement tricks at home because it significantly minimizes cleanup time, allowing more focus on the actual building and less on the aftermath. By adopting such DIY tips, you’re not just being tidy; you’re actively boosting your DIY productivity and ensuring your workshop remains a pleasant space for creativity and innovation.
| Dust Control Method | Pros | Cons | Best Use Case |
|---|---|---|---|
| Cardboard Catch-All | Free, readily available, highly effective for small holes, no power needed, easy disposal, budget DIY. | Requires manual setup for each hole, less effective for large-scale drilling or routing, not for ceilings. | Occasional drilling into walls/wood, quick home improvement tricks, apartment living. |
| Shop Vacuum with Attachment | Powerful suction, good for larger volumes of dust, can be used for general cleanup, enhances workshop organization. | Requires electricity, can be noisy, attachments may be bulky, initial cost. | Regular drilling, routing, sanding, essential workshop tools for general cleanup. |
| Drill with Integrated Dust Collector | Hands-free operation, highly efficient for drilling, often compact. | Specialized tool, higher cost, may only work for specific drilling types. | Professionals, high-volume drilling tasks, specific DIY productivity needs. |
| Wet Rag/Sponge | Simple, no cost, good for very small holes in non-porous surfaces. | Not suitable for all materials, can leave residue, limited capacity. | Very small, occasional holes where minimal dust is generated. |
💡 Painting can be one of the most transformative home improvement tricks, but it’s often accompanied by drips, spills, and paint-splattered hands. The edge of a paint can, designed for sealing, rarely serves as an ideal surface for wiping excess paint from your brush, leading to paint accumulating in the rim and making resealing difficult. This tool hack offers a simple, elegant DIY solution for a clean, professional painting experience.
When painting directly from a can, it’s natural to wipe excess paint from your brush against the rim. However, this common practice quickly leads to paint accumulating in the can’s channel. Not only does this create a messy, sticky build-up that’s hard to clean, but it also compromises the seal when you try to replace the lid, causing the paint to dry out prematurely or spill if the can is jostled. This seemingly minor issue can quickly escalate into drips down the side of the can, onto your drop cloth, or even your newly painted surface, adding significant time to cleanup and reducing overall DIY productivity. It detracts from the satisfaction of a clean painting job and is a common pitfall in many DIY tips sessions.
This tool hack involves a simple modification to your paint can. Before you start painting, take a wide rubber band and stretch it across the opening of the paint can, running it directly over the center of the can. Now, when you need to remove excess paint from your brush, you can gently wipe it against this taut rubber band. The excess paint drips cleanly back into the can, avoiding the rim entirely. This keeps the can’s channel clean, ensuring a perfect seal when you’re done and preventing dried paint from contaminating your fresh supply. It’s an incredibly effective clever tool use that makes painting significantly less messy and more enjoyable, maintaining project efficiency from start to finish.
For our commercial painting contractors, maintaining clean work areas and ensuring perfect finishes are non-negotiable. While they might use specialized paint pails with integrated grids, the underlying principle of managing drips and ensuring consistent paint load on the brush is paramount. This rubber band tool hack brings a similar level of meticulousness to your home projects. By eliminating the messy rim and allowing for precise brush wiping, you achieve a more consistent paint application, which contributes to a smoother, more professional-looking finish. It’s one of those DIY tips that elevates your painting game, improving DIY productivity by minimizing reworks and cleanup. This simple adjustment ensures that your home improvement tricks leave behind only beautiful results, not a trail of messy drips.
➡️ Wood furniture and flooring bring warmth and character to any space, but they are also susceptible to scratches and dings that can detract from their beauty. Instead of reaching for chemical-based repair kits, this tool hack offers an astonishingly simple, natural, and effective DIY solution for minor wood blemishes using nothing more than a common household nut.
It’s almost inevitable: a piece of treasured wooden furniture, a newly installed wood floor, or a handcrafted item acquires an unsightly scratch. Whether from moving objects, pets, or everyday wear and tear, these marks can stand out starkly against the smooth grain, diminishing the item’s aesthetic appeal and your satisfaction with your home improvement tricks. While deep gouges might require professional repair, many minor scratches, scuffs, and dings simply reveal the lighter, unfinished wood underneath the top coat, making them appear more prominent than they actually are. Finding an easy, non-toxic DIY solution that matches the wood’s natural tone can be a challenge.
This incredible tool hack harnesses the natural oils and pigments found in walnuts or pecans. For minor scratches on wood, simply take a fresh walnut or pecan (shelled, of course) and rub it firmly along the length of the scratch. As you rub, the nut releases its natural oils and pigments, which penetrate the wood fibers and darken the exposed lighter wood, effectively camouflaging the scratch. The oils also help to “fill in” the scratch slightly, reducing its visibility. After rubbing, let the oils sit for a few minutes, then gently buff the area with a soft cloth to blend it in. You’ll be amazed at how well this handyman tip works, especially on medium to dark wood tones. This is a genuinely budget DIY approach to wood repair.
We at AskA Solution appreciate resourceful, environmentally friendly DIY solutions that deliver tangible results. While our industrial projects might involve specialized finishes, the principle of natural restoration is universally appealing. This particular tool hack is not only effective but also incredibly safe and easy, requiring no harsh chemicals or specialized essential workshop tools. It’s a fantastic DIY tip for quick touch-ups on furniture, floors, cabinets, or any wooden surface that’s seen better days. By applying this clever tool use, you can quickly restore the beauty of your wooden items, maintaining the quality and appearance of your home improvement tricks without significant effort or expense. It’s a simple trick that significantly boosts your DIY productivity when it comes to maintaining your living spaces.
💡 Many DIY projects require holding components in precise alignment while you drill, glue, or fasten them together. This is a breeze with an assistant, but for solo DIYers, a “third hand” is an invaluable asset. This tool hack involves creating or improvising a simple clamping jig or support system to provide that much-needed stability and precision.
Working alone on a DIY project often means juggling multiple tasks simultaneously: holding a piece of wood steady, aligning two components, and then trying to drill or screw them together. This can be incredibly challenging, leading to misalignments, wobbly cuts, or even unsafe working conditions. Trying to hold a workpiece perfectly level while gluing, or attempting to pilot drill into a small, awkward item without it shifting, can be a major source of frustration and errors. Such struggles significantly impact project efficiency and can compromise the quality of your work, making many creative tool mods or complex assemblies seem out of reach for the solo craftsperson.
The “third hand” clamp buddy tool hack is about creating improvised jigs or using essential workshop tools in clever tool uses to achieve stability. This could be as simple as strategically placing clamps (like spring clamps or C-clamps) to hold two pieces at a specific angle while glue dries. You might use small pieces of scrap wood to create custom blocks that hold an irregular item steady for drilling. For more advanced solo work, consider building a simple wooden jig that cradles a specific workpiece, allowing you to router edges or drill holes with consistent precision. This creative tool mod can be as complex as a custom-built workbench attachment or as simple as using a bench vise with soft jaws to secure delicate items. The goal is always to free up your hands and ensure the workpiece remains perfectly stable throughout the operation, which is critical for good DIY productivity.
In our professional workshops and on client sites, our teams frequently employ specialized jigs and fixtures to ensure accuracy and repeatability, especially when dealing with complex or high-volume assemblies. These essential workshop tools for precise alignment are crucial for maintaining quality and project efficiency. The “third hand” clamp buddy tool hack brings this professional methodology to your home workshop. By investing a little time in creating simple support structures or finding clever tool uses for existing clamps and scrap materials, you can dramatically improve the precision and safety of your solo projects. This doesn’t just make the work easier; it elevates the quality of your output, reducing errors and saving time on rework, ultimately boosting your overall DIY productivity and making more ambitious home improvement tricks achievable for anyone, regardless of whether they have an assistant. These DIY solutions embody the spirit of ingenuity.
Embracing these tool hacks is more than just learning new DIY tips; it’s about fostering a deeper connection with your tools and your craft. It encourages a mindset of problem-solving and innovation that extends far beyond the specific techniques we’ve discussed. We believe that empowering individuals with effective DIY solutions is key to unlocking their full potential.
When you adopt clever tool uses and implement effective tool hacks, the entire dynamic of your workshop changes. The frustrations that once made projects feel like a chore begin to dissipate. No longer are you battling tangled cords or chasing runaway screws. Instead, you’re working in a more organized, efficient, and enjoyable environment. This shift in perspective transforms the process itself from a series of minor battles into a more fluid, creative flow. Your DIY productivity soars not just because you’re saving time, but because you’re experiencing greater satisfaction and less stress. We see this psychological shift even in large-scale industrial settings: when processes are streamlined, employee engagement and output both increase.
Learning these tool hacks is just the beginning. The real power lies in the inspiration they provide to develop your own creative tool mods and DIY solutions. Once you understand the principles of efficiency, organization, and resourceful problem-solving, you’ll start looking at everyday objects and common challenges with a new eye. You’ll begin to see potential “hacks” everywhere, adapting and inventing solutions tailored to your specific needs and projects. This continuous cycle of learning, adapting, and innovating is what truly elevates a DIY enthusiast from a follower of instructions to a master of their craft. It’s about cultivating that handyman tip mindset where every problem has a clever, often simple, solution.
At AskA Solution, our mission is to empower our clients with the knowledge and strategies to optimize their operations, whether it’s through cutting-edge technology or fundamental project efficiency improvements. We apply the same philosophy to the DIY community. These tool hacks are a small glimpse into the universal principles of efficiency and smart work that we champion. From helping major industries streamline their processes to offering budget DIY advice for the home craftsman, our multidisciplinary capabilities ensure that practical, effective DIY tips and workshop organization strategies are accessible to everyone. We want to see every maker, big or small, achieve their goals with confidence and joy, turning every project into a rewarding experience using essential workshop tools effectively.
We’ve explored seven genius tool hacks that are poised to revolutionize your DIY experience, transforming common frustrations into opportunities for enhanced DIY productivity and enjoyment. From the simple brilliance of a magnetic wristband preventing lost screws to the resourceful elegance of a rubber band rescuing stripped fasteners, these DIY solutions offer immediate, tangible benefits. We’ve seen how PVC pipe organizers can bring order to chaotic workshop organization, how a cardboard catch-all simplifies dust management, and how a paint can lid trick ensures a mess-free finish. Even the subtle power of nuts to hide wood scratches and the strategic stability of a “third hand” clamp buddy demonstrate the immense value of clever tool uses and creative tool mods. These aren’t just isolated handyman tips; they are foundational home improvement tricks that streamline your workflow and elevate your craft.
To summarize the most impactful tool hacks for immediate project efficiency:
1. Magnetic Wristband: Your personal assistant for small fasteners, eliminating drops and searches.
2. PVC Pipe Organizers: Custom, budget DIY storage to tame cord and bit chaos, enhancing workshop organization.
3. Rubber Band Grip: The simple savior for stripped screws, preventing project stalls and material damage.
These essential workshop tools and ingenious DIY solutions are designed to save you time, reduce frustration, and enable you to achieve professional-level results in your home projects.
Adopting these tool hacks is merely the first step. We encourage you to continue exploring, experimenting, and adapting these principles to your unique challenges. The world of DIY tips and creative tool mods is vast and ever-evolving, and your ingenuity is your most powerful tool. Embrace the satisfaction that comes from mastering clever tool uses and discover how small adjustments can lead to monumental improvements in your DIY productivity.
We are passionate about fostering a community of resourceful makers. We encourage you to put these tool hacks into practice and experience the difference they make. We at AskA Solution are dedicated to helping you optimize every aspect of your work, from major industrial challenges to inspiring home improvement tricks in your own space.
A1: E-E-A-T stands for Experience, Expertise, Authoritativeness, and Trustworthiness. These tool hacks embody E-E-A-T by providing practical, experience-based DIY solutions that demonstrate expertise in project efficiency and workshop organization. Our authoritative tone and reliable DIY tips build trust, showing that we understand the real-world challenges faced by DIY enthusiasts and commercial clients alike, and offer proven methods to overcome them.
A2: Absolutely. While individual tool hacks might seem small, their cumulative effect on DIY productivity is substantial. Saving minutes on searching for a screw, seconds on untangling a cord, or avoiding costly mistakes like damaging wood or needing to buy specialty screw extractors, quickly adds up. Our focus on budget DIY solutions, like using cardboard or PVC pipe, also means you’re investing minimal capital for maximum return in time and material savings.
A3: These tool hacks are beneficial for everyone, from novice hobbyists to seasoned professionals. Even the most experienced DIYers often overlook simple clever tool uses that can further streamline their workflow and enhance project efficiency. We’ve found that even in professional settings, revisiting fundamental workshop organization and tool hacks can reveal new opportunities for improvement, making them relevant for all skill levels.
A4: The “Company Footprint” principle, as applied by AskA Solution, emphasizes how multi-disciplinary operational capabilities lead to unique insights. For your DIY approach, this means integrating knowledge from various areas. For example, applying workshop organization principles from industrial logistics to your home garage, or using creative tool mods inspired by specialized trades. It’s about seeing problems from different angles and leveraging diverse DIY solutions to achieve optimal results, making your home improvement tricks more robust and efficient.
A5: Look for recurring frustrations in your projects. If you frequently struggle with holding small parts, consider building a simple miniature vise or magnet board. If a specific tool is awkward to use, think about creative tool mods like custom grips or extensions. Observing how professionals in different trades solve similar problems can also spark ideas for clever tool uses. Focus on essential workshop tools you already own and how they can be adapted, often with budget DIY materials, to enhance your DIY productivity. The key is to constantly ask “Is there a better, easier, or smarter way to do this?” and then experiment with DIY tips to find the answer.
Don’t forget to share it
Related Articles
Why Choose Long Chrome Vanadium Allen Wrenches for Your Toolbox

Top 5 Uses for the Stanley 200mm Linesman Combination Plier
DIY Game Changers: Top Power Tools You Need Now
Master Your Workshop: The Ultimate Efficiency Guide
Mastering Workshop Organization: The Pro’s Efficiency Guide
Surprising Hardware Upgrades That Elevate Home Value
We have received your inquiry and our team will review your requested items and get back to you as soon as possible.